Sunday, November 22, 2020

Whole Wheat Bread/Rolls 2020

 By Lindsey Scarber

Total time: 2.5 hours                      Prep: 70 min.

Rise 10-20 min.                              Oven: 350 F

Bake: abt 25 min.                           Makes: 4 loaves, or 4 dozen dinner rolls


3 3/4 c. hot tap water

1/3  c. sugar

1/3  c. oil

7 c.  fine-ground hard white wheat flour

2 T.  instant dry yeast

2 T. white vinegar (vinegar doesn’t change the flavor, it just helps soften the wheat and dissolve phytic acid).


Mix and knead. Let rest for 60 min. Then add…


1 ¼  Tbsp. salt, or 1 heaping Tbsp. salt

  - 3 c. bread flour (high gluten flour) as needed


Step 1 Yeast Activation

In a large bowl, or in a Bosch stand mixer with dough hook, Combine first 5 ingredients: hot water, sugar, oil, and 8 c. whole wheat flour.  Mix in yeast. Cover.  Let rest for 30 min to activate yeast.  Knead.  Let rest for another 30 min to allow whole wheat to soften and gluten to form.


Step 2 Prepping

Meanwhile, grease bottom/sides of 4 bread pans for bread, or 2 half bun sheet pans for rolls.


Step 3 Kneading

Mix in salt.  Gradually add ½ - 2 c. flour as needed.  Add flour until there is no dough stuck to the sides of the bowl and clean dry fingers stick to the dough only a little bit.  

With slightly oiled hands, Knead dough.  Separate into 4 equal balls, or for rolls small 2 in. balls.  On the countertop or a greased sheet pan, Pound out the air bubbles, until the top of the dough is smooth.  Place ball of dough in pans, coating top and bottom of dough with oil.


Step 4 Rising and Baking

Let dough rise 10-20 min in a warm quiet place, away from little hands that might want to poke it. I like putting it in the cold/slightly warm oven. With bread still rising in the oven, preheat oven to 350 F.

Bake bread for 30-35 min. or until top and bottom of loaves are golden brown.

Bake rolls for 15-17 min. or until tops are golden brown.


Step 5 Storing

Remove from pans immediately and place on a paper towel or metal cookie rack. Hot bread can be sliced thick.  Wait 30 min before trying to slice thin.  Store in an air-tight container or bag at room temperature for 2-3 days.  Store long-term in the freezer. Do not store bread in fridge, it will cause it to dry out.


Sunday, September 20, 2020

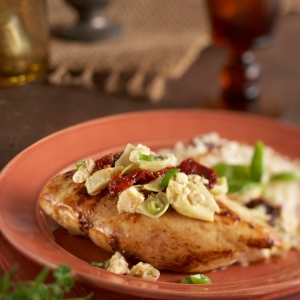
Mediterranean Chicken with Sun-Dried Tomatoes

This is literally a winner. It won first place in our recipe contest one year. I'd say I've made this very mediterranean, artichoke-focused dish 100 times. It's always a crowd favorite and should be served at special occasions, or often, whichever comes first.

Ingredients

  • 1 Jar - 8.5 oz. Bella Sun Luci Sun Dried Tomatoes in Olive Oil & Herbs
  • 1 cup well drained, chopped artichoke hearts
  • 4 oz. crumbled Feta cheese
  • ¼ cup freshly grated Parmesan cheese
  • ½ cup mayonnaise
  • 1 garlic clove, minced
  • 4 green onions, diced
  • ½ tsp. Kosher salt
  • ½ tsp. freshly ground black pepper
  • 4 boneless skinless chicken breasts, flattened slightly to an even thickness
  • 4 cups hot cooked rice
  • ¼ cup slivered almonds, lightly toasted
  • ¼ cup fresh basil leaves, julienned
  • Serves 4

Directions

  1. Preheat oven to 350 degrees. Drain sun dried tomatoes, reserving oil.
  2. In a large mixing bowl blend 1/2 cup of the drained tomatoes with the chopped artichoke hearts, Feta and Parmesan cheeses, mayonnaise, garlic, green onions, salt and pepper.
  3. heat reserved olive oil (from tomatoes) in a large skillet placed over medium heat; when hot, add chicken and sear both sides to light brown.
  4. Remove chicken to oven-proof casserole dish and arrange in a single layer.
  5. Top chicken with tomato-artichoke mixture. Place uncovered dish into the preheated oven and bake 20-30 minutes, or until hot and bubbly.
  6. mix remaining sun dried tomatoes with the cooked rice and almonds.
  7. Press 1/4 of the rice into a cup or large ramekin, then invert onto plates.
  8. Rice should come out in a molded shape, repeat.
  9. Place chicken on top of each serving of rice and sprinkle with basil leaves.
PRINT RECIPE

Sunday, May 31, 2020

Whole Wheat Oatmeal Chocolate Chip Cookies {Made with Coconut Oil}

Recipe from Twopeasandtheirpod.com

These healthier cookies are my FAVORITE! They are made with whole wheat flour, coconut oil, oats, and dark chocolate! Bake a batch today!

Ingredients

  •  2 cup white whole wheat flour or all-purpose flour
  •  teaspoon baking powder
  •  1 teaspoon baking soda
  •  teaspoon salt
  •  cup coconut oil, softened (not melted)
  •   cup light brown sugar
  •  1/2 cup granulated sugar
  •  2 large eggs, at room temperature
  •  2 teaspoons vanilla extract
  •  1-1/3 cup old fashioned oats
  •  1 cup dark chocolate or semi-sweet chocolate chips
  • 1 cup chopped pecans or walnuts, optional
  •  Sea salt, for sprinkling on cookies

Instructions

  1. Preheat oven to 350 degrees F. Line a large baking sheet with a Silpat baking mat or parchment paper and set aside.
  2. In a medium bowl, whisk together white whole wheat flour, baking powder, baking soda, and salt. Set aside.

  3. In the bowl of a stand mixer, beat together softened coconut oil, brown sugar, and granulated sugar. Beat until smooth. Add in the eggs and vanilla extract. Mix until combined.
  4. With the mixer on low, slowly add in the flour mixture. Mix until just combined. Don’t overmix. Stir in the oats, nuts, and chocolate chips.
  5. Form the cookie dough into balls, about 2 tablespoons of dough. Place on prepared baking sheet, 2-inches apart. Sprinkle with sea salt, if desired. Bake for 10 minutes or until cookies are slightly golden around the edges and soft in the center. Remove from oven and let cool on baking sheet for 2 minutes. Transfer to a wire cooling rack and cool completely.
  6. Note-cookies will keep in an airtight container on the counter for 2 days. The cookies also freeze well. 
  7. You can use raisins or dried cranberries instead of chocolate chips.

Nutrition Facts
Whole Wheat Oatmeal Chocolate Chip Cookies {Made with Coconut Oil}
Amount Per Serving
Calories 136Calories from Fat 72
% Daily Value*
Fat 8g12%
Saturated Fat 6g30%
Cholesterol 7mg2%
Sodium 76mg3%
Potassium 73mg2%
Carbohydrates 16g5%
Fiber 1g4%
Sugar 9g10%
Protein 2g4%
Vitamin A 14IU0%
Calcium 18mg2%
Iron 1mg6%
* Percent Daily Values are based on a 2000 calorie diet.

Tuesday, May 5, 2020

Peanut Butter Granola


Peanut Butter Granola

Only a few ingredients.  The oats and peanuts in granola are good sources of vegetarian protein. It is cost effective if the quick oats are purchased in bulk, 25-50 lb. bags. I usually make the 'reduced sugar' version of the recipe.  My kids love it!  -Lindsey Scarber

12  c.  Quick or Rolled oats  
½ - 2  c.   sweetened coconut flakes, optional


1  c.  coconut oil, or vegetable oil
2  c.  honey
4  c.  (32 oz) peanut butter, crunchy or creamy
1/2  c. water
 ½ -1  tsp salt, optional


In a large bowl, Mix the first 2 dry ingredients: oats and coconut.  Set aside.
In a medium saucepan over MED heat, combine all other ingredients.
Stir occasionally until combined.
Meanwhile, Grease 2-4 sheet pans, or 1 stainless steel industrial pan 4inches deep


Pour the wet into the dry ingredients. Stir
Spread granola evenly onto the greased sheet pans. 


Bake at 300° for 25 min.  Use two racks in the oven baking, if needed. 
Remove from oven. Stir.  
Bake more minutes until crispy and light golden brown. Or, if baking in the evening, turn off the oven and leave in oven overnight to dehydrate and cool to room temp.


Let cool to room temperature.  
Store in an airtight container, such as a used #10 can with plastic lid.  
Serve with milk, nuts, raisins, Craisins, cinnamon, yogurt, prepared powdered, milk, or reconstituted evaporated milk, etc.   
Store in pantry for 3-6 months. 


Speedy recipe:
Use a #10 can of quick oats (about 12 c.) and two 16-18 oz. containers of peanut butter


Reduced-sugar Recipe:  
Remove the 2 c. honey. Replace with ½ c. water and 1 c. honey


Saturday, April 25, 2020

Single-serve overnight Oats Parfait

INGREDIENTS
1 glass wide-mouth Pint jar
1 cup homemade milk kefir (probiotics, calcium, and protein)
2 Tbsp quick oats (fiber, protein, prebiotics)
1 Tbsp chia seeds  (fiber, protein, prebiotics)
1/4 cup chopped pecans or walnuts  (fiber, protein, healthy fat, prebiotics)
1 Tbsp local honey, optional

Add your favorite chopped fruit immediately before eating:
fresh fruit - bananas, apples, pears, strawberries, mango, etc
canned fruit - diced peaches, diced pears, crushed pineapple, etc
frozen fruit - blueberries, strawberries, mango, etc


INSTRUCTIONS
Place all ingredients in the pint jar, except chopped fruit. Stir. Put a lid on it. Place on counter top overnight, or at least 7 hours.  In the morning, add chopped fruit and eat for breakfast, or in the morning place in the fridge for up to 1 week, add chopped fruit right before serving.


NOTE on KEFIR
Kefir has 60 strands of probiotics! When compared to the 3-7 found in commercial yogurts,  kefir stands supreme.  Eating a serving of kefir everyday helps me 'feel full' throughout the day, not eat more than I should, and maintain a healthy weight.  It also helps strengthen my immune system. I could take a supplement-form of probiotics for $30-$60 dollars/month, or I could eat homemade kefir for the minimal cost of the milk used.  
If you want to try kefir, stop by my house for kefir grains, or 'google' a homemade milk kefir recipe!


NOTE on SOAKING WHOLE GRAINS,  NUTS, and SEEDS: 
Many digestion issues such as leaky gut syndrome and IBS can be traced to eating foods that are difficult to digest.
Toxic lectins and phytates, or phytic acids, are anti-nutrients found on the outer hull layer of every whole grain, nut, and seed. Lectins and phytates block the absorbion of many vital vitamins and minerals and harm the fragile intestinal wall.  Soaking whole grains, nuts, and seeds at room temperature, in slight acidity, overnight or at least 7 hours, creates a chemial action that disassembles lectins and phytic acid. Soaked grains, nuts, and seeds are easily digestible, encourage vitamin and mineral absorption, and help prevent symptoms of IBS and leaky gut syndrome.
     -Lindsey Scarber


Warm Iron Absorption Molasses Drink and a cool article about Iron Content in Food

This warm Molasses Drink recipe helps the body absorb a good amount of 'non-heme' iron, mainly from its Blackstap Molasses.  It is very difficult for the body to absorb iron because there are so many foods that inhibit absorption. Take the warm Molasses Drink daily with an iron absorption meal. An ideal iron absorption meal would contain 'heme' and 'non-heme' iron and is 2 hours after and 2 hours before food which can inhibit iron absorption.

_ _ _ __
Foods and Nutrients that HELP iron absorb are:
-Vitamin C: oranges, lemons, orange juice without added calcium
-Beta carotene: carrots, pumpkin, sweet potato, oranges, tomato, etc
-Heme Iron: meats, especially red meat and liver
-Natural sugars: honey, blackstrap molasses, and sweet fruits that do not contain tannins, oxylates, or added refined sugars

_ _ _ _ _
Foods and Nutrients that STOP iron absorption are:
- Calcium: milk, cheese, yogurt, milk kefir, all dairy products that contain calcium, bone broth, sardines, canned salmon, fruits and veggies that contain tannins, oxylates or refined sugars
- Eggs inhibit iron absorption due to the 'egg factor,' see article below.
-  Refined Sugars: cane sugar, coconut sugar, fructose, corn syrup, high fructose corn syrup, etc.
- Oxylates or Oxalic acid found in: spinach, kale, beets, nuts, chocolate, tea, wheat bran, brans and hulls from all whole grains. rhubarb, strawberries and some herbs
- Phytates or phytic acid: soy protein, fiber. Also, whole grains, nuts, and seeds that have not been soaked overnight
- Polyphenols or Phenolic compounds include: 
     - Chlorogenic acid found in: cocoa, coffee, some herbs
      - Phenolic Acid found in: apples, peppermint and some herbal teas
      - Tannins or Tannic acid found in: fruits such as pears, apple skins, blackberries, cherries, cranberries, elderberry, grapes, kiwi, raspberries, blueberries, apricots, crab apples, black currants, elderberries, figs, peaches, plums, raisins, blackberries, cherries, currants, grapes, loganberries, raspberries; Also walnuts, black teas, cocoa, and some spices


I have low iron when I get to the third trimester of pregnancy, called pregnancy anemia. I get dizzy, weak, and shaky.  When I feel that my arms and legs are 200 lbs each, I decide to address increasing iron absorption by adding an iron-rich meal everyday. Because there are so many foods that inhibit iron absorption, i'm careful to include only specific foods in my 'iron- absorption' meal. Its working for me. I have my energy back!

My iron-rich meal is usually breakfast and includes 
- 1/2 of a sliced orange (Vit C & beta-carotene)
- iron absorption Molasses Drink (non-heme iron & Vit C),  
- beef stew- double the stewing beef (for heme-iron), double the carrots (for beta-carotene), potatoes, onions, celery, tomato sauce (beta-carotene) 
- when i'm feeling brave the occasional pasture-fed beef liver pate mixed into the beef stew. 

Liver is one of the best sources of iron. It is also the best source of preformed activated Vitamin A. Preformed Vitamin A helps fetal growth and development. When my CNM and I discussed low iron, she recommended liver as the best food source of iron.

When I finish the Warm Molasses Drink and Iron absorption meal, I take note of the clock and wait 2 hours before eating other foods.


- - - - - - - - - - - - - - - - - - - - - - - - - -
Warm Iron-Absorption 
Molasses Drink Recipe

2 cups filtered water, or one 16 oz bottle of purified water.

1 Tbsp  organic 'Blackstap' Molasses 
     (Check ingredients Label to ensure it includes 20% daily non-heme iron and 20% daily calcium)

1 Tbsp  Bragg's Apple cider vinegar (ACV) with the Mother 
     (PH regulator and helps dissolve the Calcium in the molasses)

1/4  of a lrg lemon squeezed into the drink (Vitamin C and helps dissolve the Calcium in the molasses) or juice 1/2 of a small lemon

2 tsp local honey, optional (natural sugars enhance iron absorption)


Directions:
In a glass wide-mouth quart jar, microwave water for 1.5 -2  minutes.  Water should be cooler than boiling point.  Boiling water will kill the benefit of apple cider vinegar and lemon juice.  Add to the warm water, ACV, lemon juice, and honey. Stir. Let sit for 10-15 minutes to help calcium dissolve. Drink while it is still warm.

Note: Most bottles of blackstrap molasses have Calcium and Iron listed in the nutrition facts. Calcium stops iron absorption. However, the lemon juice and apple cider vinegar help dissolve the calcium in the molasses over the course of the 10-15 minutes. With the Calcium gone,  the iron absorbs more readily. 
Calcium dissolution in this drink is similar to how easter eggs turn bright colors when dipped in food dye and an acid. Vinegar and lemon juice etch holes in the calcium-rich egg shell, allowing food dye to penetrate the shell and stay. 

The lemon juice has Vitamin C to help iron absorb. The Apple Cider Vinegar is a super food with many other added benefits and helps to balance the taste between the Molasses and the lemon juice. Enjoy!
-Lindsey Scarber

- - - - - - - - - - - - - - - - - - - - - - - - - - -


Below is extra info on IRON absorption in Foods from an awesome website: Irondisorders.org -> Diet / Iron Content in Foods 


Achieving Iron Balance with Diet

If a person is iron deficient he or she will want to incorporate substances or foods that increase or improve iron absorption and avoid foods or substances that impair absorption.  If a person has abnormally high body iron levels, he or she will want to consume foods or substances that lower the amount of iron absorbed.  People with complicated iron balance issues associated with sickle cell disease, thalassemia, blood diseases and cancers will need to work out an individual diet plan starting with the Diet for Iron Balance.

Substances that INCREASE iron absorption:


Vitamin C 

Ascorbic acid or Vitamin C occurs naturally in many vegetables and fruits, especially citrus. Ascorbic acid can also be synthesized for use in supplements. Ascorbic acid enhances the absorption of nutrients such as iron.    In studies about effects of ascorbic acid on iron absorption, 100 milligrams of ascorbic acid increased iron absorption from a specific meal by 4.14 times.


Beta-Carotene

Beta-carotene is one of more than 100 carotenoids that occur naturally in plants and animals. Carotenoids are yellow to red pigments that are contained in foods such as apricots, beets and beet greens, carrots, collard greens, corn, red grapes, oranges, peaches, prunes, red peppers, spinach, sweet potatoes, tomatoes, turnip greens and yellow squash. Beta-carotene enables the body to produce vitamin A. In studies of the effects of vitamin A and beta-carotene on absorption of iron, vitamin A did not significantly increase iron absorption under the experimental conditions employed. However, beta-carotene significantly increased absorption of the iron. Moreover, in the presence of phytates or tannic acid, beta-carotene generally overcame the inhibitory effects of both compounds depending on their concentrations. Like vitamin E, beta-carotene is an excellent anti-oxidant, but one should take any of these judiciously.  Studies have shown that taking vitamin A habitually in amounts of 25,000 IU or more can cause liver problems. Opting for supplemental beta-carotene, instead of choosing food sources, can enhance the progression of some cancers. The best source of beta-carotene and Vitamin A is natural whole foods.


Additive fortified iron:

EDTA+fe and Ferrochel are additive iron compounds that are emerging as candidates for fortification by major food manufacturers. Both additives were found to exceed absorption capabilities of the commonly-used iron-fortificant ferrous sulfate.

Hydrochloric acid

Hydrochloric acid (HCI) present in the stomach, frees nutrients from foods so that they can be absorbed and enhances iron absorption.

'Heme' iron - Meat, especially red meat

Heme iron, specially red meat, increases the absorption of non-heme iron. Beef, lamb, goat, and venison contain the highest amounts of heme as compared to pork or chicken which contains low amounts of heme. It has been calculated that one gram of meat, about 20 percent protein, has an enhancing effect on non-heme iron absorption equivalent to that of 1 milligram of ascorbic acid.  A Latin American-type meal (maize, rice, and black beans) with a low iron bioavailability had the same improved bioavailability when either 75 g meat or 50 mg of ascorbic acid was added

Natural Sugar, not including Refined white processed sugar

As part of the Framingham Heart Study, a National Institutes of Health project, investigators looked at the factors that increased iron stores such as diet and iron supplementation. Participants included more than six hundred elderly patients. Those who took supplemental iron along with specific kinds of fruit had higher iron stores, some as much as three times. No one is encouraged to consume sugar to improve iron absorption. Too much sugar can lead to other health problems, such as obesity and diabetes. Refined white sugar has no nutritional value. However, choosing natural sugar, such as fruit, honey, or black-strap molasses to the diet can boost iron absorption and add nutrients that are lacking in refined sugar.


Substances that IMPAIR iron absorption:


Medications that reduce the amount of acid in the stomach such as antacids or proton pump inhibitors can lead to hypochlorhydria (low stomach acid) or achlorhydria which  is the complete absence of stomach acid.

Calcium (like iron) is an essential mineral, which means the body gets this nutrient from diet. Calcium is found in foods such as milk, yogurt, cheese, sardines, canned salmon, tofu, broccoli, almonds, figs, turnip greens and rhubarb and is the only known substance to inhibit absorption of both non-heme and heme iron. Although, 50 milligrams or less of calcium has little if any effect on iron absorption, calcium in amounts 300-600 milligrams inhibit the absorption of heme iron similarly to non-heme iron. One cup of skimmed milk contains about 300 milligrams of calcium. When calcium is recommended by a healthcare provider, as is often the case for women trying to prevent bone loss, these supplements can be taken at bedtime. Calcium supplements are best taken with vitamin D and in a citrate rather than carbonate form.

Eggs contain a compound that impairs absorption of iron.  Phosphoprotein called phosvitin is a protein with a iron binding capacity that may be responsible for the low bioavailability of iron from eggs. This  iron inhibiting characteristic of eggs is called the “egg factor”. The egg factor has been observed in several separate studies. One boiled egg can reduce absorption of iron in a meal by as much as 28%

Oxalates impair the absorption of non heme iron. Oxalates are compounds derived from oxalic acid and found in foods such as spinach, kale, beets, nuts, chocolate, tea, wheat bran, rhubarb, strawberries and herbs such as oregano, basil, and parsley. The presence of oxalates in spinach explains why the iron in spinach is not absorbed. In fact, it is reported that the iron from spinach that does get absorbed is probably from the minute particles of sand or dirt clinging to the plant rather than the iron contained in the plant.

Polyphenols are major inhibitors of iron absorption. Polyphenols or phenolic compounds include chlorogenic acid found in cocoa, coffee and some herbs; Phenolic acid found in apples, peppermint and some herbal teas; and Tannins found in black teas, coffee, cocoa, spices, walnuts, fruits such as apples, blackberries, raspberries and blueberries all have the ability to inhibit iron absorption. Of the polyphenols, Swedish cocoa and certain teas demonstrate the most powerful iron absorption inhibiting capabilities, in some cases up to 90%. Coffee is high in tannin and chlorogenic acid; one cup of certain types of coffee can inhibit iron absorption by as much as 60%.   These foods or substance should not be consumed within two hours prior to and following your main iron-rich meal

Phytate is a compound contained in soy protein and fiber. Even low levels of phytate (about 5 percent of the amounts in cereal whole flours) have a strong inhibitory effect on iron bioavailability. Phytate is found in whole grains, nuts, and seeds such as walnuts, almonds, sesame, dried beans, lentils and peas, grain cereals and other whole grains. Phytate compounds can reduce iron absorption by 50 to 65 percent.


Diet for Iron Balance

When iron is appropriately distributed throughout the body in hemoglobin, muscles, ferritin and elsewhere, your diet should be geared toward continued iron balance and disease prevention. Fresh fruits, vegetables, whole grains, adequate protein, limited dairy, limited fats and sugars form the basis for a good eating plan that will assure adequate iron and lower the risk of disease.

Healthy diet checklist will include:

Fresh fruits and vegetables which provide natural hydration and a supply of antioxidants
Whole grains which provide fiber needed to keep the digestive tract clean
Adequate protein which builds muscle
Limited dairy which can cause mucous in the intestines
Limited animal fats which can trigger free radical damage. Eat healthy fats found in olive oil, cold water salmon, avocados and nuts
Limit processed sugars which contain empty calories and trigger free radical damage.
Whenever possible, consume whole foods as opposed to “foods in a pill”. Our bodies are not geared to large doses that tax the liver and knock other nutrients out of balance.
Get at least 20 minutes of physical activity a day; walk or take at least 10,000 steps if you can.
NOTE: Individuals with hereditary hemochromatosis should not consume raw shellfish


Thursday, April 23, 2020

Best Homemade Brownies - tastes like box brownies only better

Prep Time: 5 mins

Cook Time: 45 mins
Serves 16 brownies
The ultimate recipe for brownies! They're fudgy, moist, and dark chocolaty, with perfect crinkly tops

From Weeknight Baking by Michelle Lopez.

Ingredients

  • 1 1/2 cups granulated sugar
  • 3/4 cup all-purpose flour
  • 2/3 cup cocoa powdersifted if lumpy
  • 1/2 cup powdered sugarsifted if lumpy
  • 1/2 cup dark chocolate chips
  • 3/4 teaspoons sea salt
  • 2 large eggs
  • 1/2 cup extra-virgin olive oil (or canola oil)
  • 2 tablespoons water
  • 1/2 teaspoon vanilla

Instructions

  • Preheat the oven to 325°F. Lightly spray an 8x8 baking dish with cooking spray and line it with parchment paper. Spray the parchment paper.
  • In a medium bowl, combine the sugar, flour, cocoa powder, powdered sugar, chocolate chips, and salt.
  • In a large bowl, whisk together the eggs, olive oil, water, and vanilla.
  • Sprinkle the dry mix over the wet mix and stir until just combined.
  • Pour the batter into the prepared pan and use a spatula to smooth the top. Bake for 40 to 45 minutes, or until a toothpick comes out with only a few crumbs attached (note: it's better to pull the brownies out early than to leave them in too long). 
  • Cool completely before slicing. Store in an airtight container at room temperature for up to 3 days. These also freeze well!

Friday, April 10, 2020

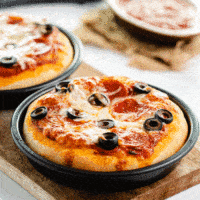
Pizza Hut Pan Pizza Crust COPYCAT recipe

Copycat Pizza Hut Personal Pan Pizza crust dough and sauce


Written By: Stephanie JANUARY 7, 2016
Now you can make your Pizza Hut personal pan pizza at home! This dough comes together easily and can be made up to 4 days ahead or even frozen for future use! Add your favorite pizza toppings and enjoy every bite of that golden, buttery crust!

I have been obsessed with Pizza Hut’s personal pan pizzas since I was in like, third grade. And I haven’t grown out of it a bit! I’m psyched to have this recipe, it’s definitely a keeper. I’ll tell you about making this dough ahead of time, how to freeze it, what pans you can use, and I’ll even throw in a Copycat Pizza Hut Pizza sauce recipe!


You’ll have everything you need to know so that you can nail this pizza at home too! Let’s do this. 

Pizza Hut Dough Ingredients

  • All-Purpose Flour
  • Olive Oil
  • Active Dry Yeast
  • Dry Milk
  • Salt
  • Sugar
  • Cornmeal- Optional. I’ve successfully made this with just some olive oil on the bottom of the pan.
  • Butter- Optional. I like to brush melted butter on the finished pizza crust for even more flavor.

Water Temperature for Pizza Dough

  • The temperature of the water that you use should be “warm“, or between 105 and 110°F.
  • candy thermometer can be used to test the temperature, otherwise just use your best judgement, the water should be warm but definitely not anywhere close to hot.

Making Pizza Dough Ahead of Time

Pizza dough tastes even better if you make it ahead of time.
  • Once it’s finished rising, cover it with plastic wrap.
  • Refrigerate it for up to four days. 
  • Let it come to room temperature before baking it.

Freezing Pizza Dough

Pizza dough freezes very well and makes for easy future meals.
  • Make sure the dough has completely risen.
  • Roll it into a ball and cover it with plastic wrap. Freeze for up to 3 months.
  • Let it sit in the fridge overnight to defrost prior to using it.

Freezing Pizza Sauce

Extra homemade pizza sauce is great for freezing.
  • Pouring the sauce into ice cube trays makes it easy to remove portion-sizes from the freezer. (Here’s a visual)
  • Frozen pizza sauce is best if used within 6 months.


Copycat Pizza Hut Personal Pan Pizza Recipe

prep time: 1 HOUR 40 MINUTES
cook time: 15 MINUTES
total time: 1 HOUR 55 MINUTES


SERVINGS: 6
Now you can make your favorite Pizza Hut personal pan pizzas from home! This dough comes together easily and can be made up to 4 days ahead or even frozen for future use! Add your favorite pizza toppings and enjoy every bite of that golden, buttery crust

Ingredients

Copycat Pizza Hut Personal Pan Pizza Dough

  • 2 & 2/3 cups warm water105-110°F
  • 1/2 cup Non-fat dry milk
  • 1 teaspoon Salt
  • 6-8 cups high-gluten Flour
  • Tablespoons Sugar
  • package Active Dry yeast
  • 1/4 cup olive oil for doughplus more to grease pans.
  • 1/4 cup melted butteroptional
  • 8 oz. Mozzarella cheeseGrated
  • Your favorite pizza toppings

Copycat Pizza Hut Pizza Sauce

  • 29 oz. Tomato Sauce
  • 1/2 cup water
  • 1 Tbsp sugar
  • 1 teaspoon dried oregano
  • 1 teaspoon dried basil leaves
  • 1 teaspoon dried thyme
  • teaspoon garlic powder
  • 1 teaspoon salt
  • 1/4 teaspoon black pepper
  • 1 teaspoon lemon juice
  • bay leaves

Instructions

Pizza Dough Instructions

  • Combine the sugar, salt, dry milk, and yeast in a large mixing bowl.
  • Add the warm water and mix well.
  • Let it sit for two minutes.
  • Add the oil and stir, the oil will still appear separated from rest of mixture.
  • Mix in the flour and stir until the flour is absorbed and a dough is formed. -The dough will be very sticky, this is good, don't add more flour.
  • Use a stand mixer with a dough paddle attachment to stir for 10 minutes. You can also knead by hand on a flat surface.
  • Divide the dough into equal parts and roll into balls. (3 balls for 8-inch pans, 6 balls for 6-inch pans.)
  • Place the balls of dough in a warm place, (*see notes), and let it rise for an hour and a half.
  • Preheat oven to 450 degrees.
  • Take the risen dough and use a rolling pin to roll them into 6 or 8-inch circles.
  • Use a paper towel to spread a bit of olive oil around the bottom and sides of the pizza pans, or sprinkle with a little bit of corn meal.
  • Place the rolled dough into the pizza pans. No need to create a crust with your fingers, just leave the dough perfectly flat on the bottom of the pan, the crust will rise in the oven.
  • Top the pizzas with pizza sauce, desired toppings, and grated mozzarella cheese.
  • Bake for about 15 minutes, until the cheese is hot and bubbly and the crust is golden brown.
  • Brush the crusts with melted butter if desired and serve!

Pizza Sauce Instructions

  • Combine all ingredients in a small saucepan. 
  • Bring to a light boil, then decrease the heat to medium-low and let it simmer with a lid slightly cracked for 30-45 minutes, until desired thickness is obtained. 
  • Yields 2 cups. Any additional pizza sauce can be refrigerated for up to three days, or frozen for 6 months. 

Papa Murphey's Garlic Chicken Pizza COPYCAT recipe

Great recipe from 'Cake Baker' @ food.com

READY IN: 30 mins

SERVES: 8

YIELDS: 1 Pizza

INGREDIENTS

  • 1  cup  ranch dressing
  • 1  tablespoon garlic, minced

  • 1  cup chicken, cooked and diced
  • 12  green onion, sliced 
  • 12 tomato, chopped
  • 1cup mushroom, sliced
  • 1  cup mozzarella cheese
  • 1 pizza crust

DIRECTIONS

Sunday, February 16, 2020

Authentic Eritrean INJERA sourdough flatbread

My neighbor and good friend grew up in Eritrea, Africa.  She taught me how to make her native food staple, injera.  Injera is a sourdough flatbread and is made from teff, a gluten-free super grain native to Ethiopia. Injera is thicker than a crepe and thinner than a pancake and has a delightfully sour taste. Natives use injera as a plate and a spoon. The delicious salty flavors of the native veggies and stew dishes complement the sourness of the injera. 

Original Recipe From daringgourmet.com

Authentic Injera (Ethiopian Sourdough Flatbread)

Experience the unique flavor and texture of this famous fermented Ethiopian bread!

Prep Time 10 mins
Cook Time 20 mins
Fermentation Time: 3-4 days
Total Time: 4 d 20 mins
Course: Side Dish
Cuisine: ethiopian
 
Servings: 12 servings
Calories: 146kcal
Author: Kimberly Killebrew

Ingredients

  • cups teff flour, brown or ivory , or substitute a portion of it with some barley or wheat flour
  • 1 cups all-purpose white flour
  • Note: If you're new to making injera I recommend using a combination of teff and wheat as 100% teff is more challenging to work with
  • cups cold tap water
  • 1+ cup cold tap water at the end

Instructions

  • *See Daring Gourmet blog post for detailed instructions*
  • In a large mixing bowl or small bucket, stir the 2 flours together. Then add 6 cups water. Add starter if you have it. Starter is 8oz of refrigerated batter from a previous batch of injera.
  • Stir with your hands. It should be a very thin liquid. 
  • Use an extra 1 cup of water to clean the sides of the bowl as you are mixing the last little bit, to make a total of 7+ cups of water in the batter. The inside sides of the bowl should be very clean
  • Loosely place a lid or some plastic wrap on the bowl (it needs some air circulation, you just want to keep any critters out). Let the mixture sit undisturbed at room temperature for 3-4 days (the longer it ferments, the deeper the flavor). Check it periodically. The dough should sink. The liquid should rise to the top. Depending on what kind of flour you're using, you may need to add a little more water if the mixture is becoming dry.  

  • At the end of fermentation, the mixture should be fizzy and double in size. The color will be very dark. Depending on the humidity, a layer of aerobic yeast will have formed on the top. Aerobic yeast is a normal result of fermentation.  If however your batter forms mold on it, it will need to be discarded. Pour off the yeast/mold and as much of the liquid as possible. A clay-like batter will remain. Give it a good stir.
  • Pour into a jar the extra water and the surface yeast , reserve for
  • Mix separate 1/2 cup self rising flour with 2/3 cup water. Mix with batter
  • In a small saucepan, bring 1 cup of water to a boil. Stir in 1/2 cup of the injera batter, whisking constantly until it is thickened. This will happen pretty quickly. Then stir the cooked/thickened batter back into the original fermented batter. Add some water to the batter to thin it out to the consistency of crepe batter. Then add more water to make it thinner than crepe batter. I added about 3/4 cup water after the 1 cup boiling water but this amt will vary from batch to batch. The batter will have a sweet-soured nutty smell...
  • Let rest for 4 -12 hours, then remove the yeast layer. And add or remove water to make the batter a little thinner than crepe batter.
  • Heat a non-stick skillet or crepe pan over medium heat. Depending on how good your non-stick pan is, you may need to very lightly spray it with some oil. Spread the bottom of the skillet with the injera batter - not as THIN as crepes but not as THICK as traditional pancakes.
  • Allow the injera to bubble and let the bubbles pop. Once the bubbles have popped, place a lid on top of the pan and turn off the heat. Let the injera steam cook for a couple or so more minutes until cooked through. Be careful not to overcook the injera or they will become gummy and soggy. 
  • Remove the injera with a spatula and place on breathable uncoated paper plate. Let cool, then fold into quarters.  
  • Repeat.
  • Eat fresh,  Store covered at room temp for 4-5 days, refrigerate, or Freeze


  • IMPORTANT NOTE:  Both the texture and color of the injera will vary greatly depending on what kind of teff you use (dark or ivory) and whether or not you're combining it with other flours.  Gluten-based flours (e.g. wheat and barley) will yield a much different texture than 100% teff.  In the pictures and recipe below I'm using 100% dark teff, something you will not find in restaurants and will look different than what most are accustomed to, but is traditional to Ethiopian home cooking.  Make your injera according to what you prefer.


    Serving: 1flatbread | Calories: 146kcal | Carbohydrates: 28g | Protein: 5g | Fat: 1g | Sodium: 12mg | Fiber: 5g | Calcium: 68mg | Iron: 3mg

Friday, January 31, 2020

Eritrean Beef Stew to serve with INJERA

2 onions , finely diced
Olive oil
2 lbs stewing beef, chopped fine
saute.
Add 1 can (14oz) tomatoes, diced or crushed 
Simmer.
Add spices: garlic,  chicken bullion,  red pepper powder

Serve with the sourdough flatbread Injera

-recipe by Aiba Dawit from Eritrea


Kale Stew to serve with INJERA

1 Onion, finely diced
1 can 14 oz diced tomatoes, blended
4 -5 lrg leaves kale, finely chopped
Chicken bullion
Red pepper powder
Salt
Simmer on low til thick 

Homemade Soaked Granola

HOMEMADE SOAKED GRANOLA

PREP TIME: 30 MINUTES

50 years ago, instructions on the back of a package of rolled oats said, soak over night before cooking. Soaking removes the harmful phytic acid preservative from the grain, making the end product easily digestable. This granola recipe is oats soaked over night , then baked next day. It's end product is not crunchy, but soft, similar to a Quick-boil hot oatmeal.

INGREDIENTS

INSTRUCTIONS

  1. Mix coconut oil and water in a saucepan over low heat, do not boil. 
  2. Once your ingredients are melted and well-mixed, pour over rolled oats.
  3.  Stir. Add apple cider vinegar. Stir again. 
  4. Soak, covered, for 7 - 12 hours, or up to 24 hours
  5. After your oats have soaked for 7 to 24 hours, mix honey, salt, vanilla, & cinnamon in a small bowl. 
  6. Add to soaked oats. Mix well. 
  7. Spread out on two parchment paper-lined baking sheets and bake at 170 degrees for 4-6 hours, turning and breaking up the granola with a spatula every 2 hours.
  8. Remove when slightly brown, yet still slightly moist.
  9. Allow to cool and air dry for another hour, then store in an airtight container for up to 2 weeks.

RECIPE NOTES

Remember to remove the granola while still moist. Overcooking will result in a granola that is hard to chew.
Yields 12 cups